This tutorial walks through the AsalBill calculator on a phone, one screen at a time, using real screenshots of the app. By the end you will know your true cost per unit, where every rupee of an electricity bill in Pakistan goes, and how to test solar savings before you spend anything. It takes about five minutes.
A note on the screenshots. They show a sample household in IESCO's area and a made-up sample bill with an invented reference number, so no real person's bill appears. They use the fuel and quarterly adjustments reported for October 2026. Your own numbers will differ; the steps are the same. The rules behind the numbers are in the complete guide to electricity bills in Pakistan, and this tutorial links to the matching section wherever one applies.
Step 1: Open the calculator
Go to the AsalBill site on your phone. The first screen asks for two things, your electricity company and your units used, and it already shows an answer for 300 units, so you can see how it works before typing anything.
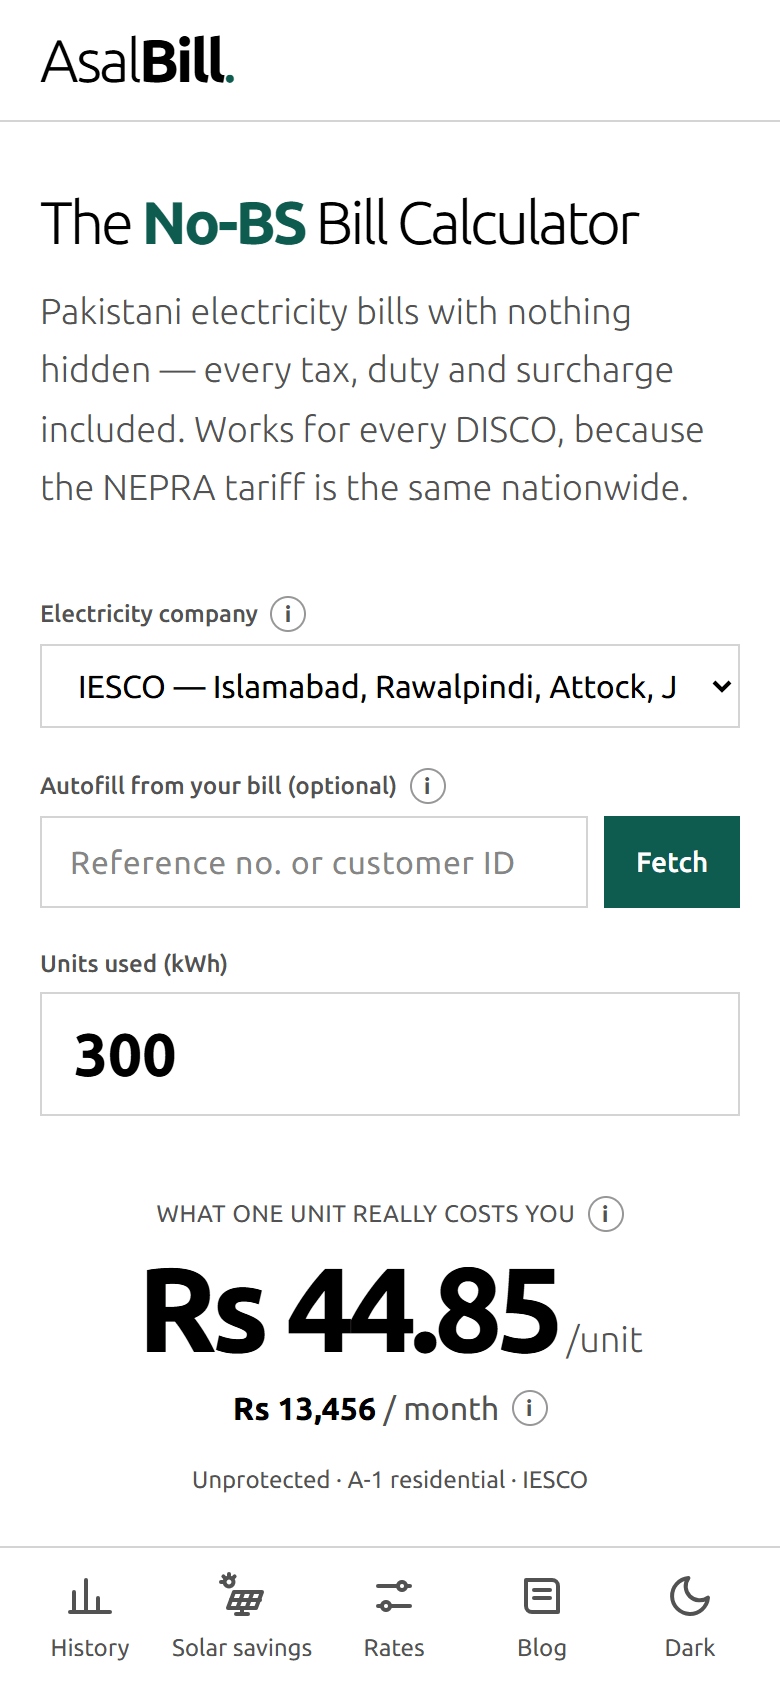
On a phone the tools sit in a bar along the bottom of the screen, within easy reach of your thumb. You can also install AsalBill like an app, which gives you an icon on your home screen and lets the calculator open without a connection:
- Android (Chrome or Edge): tap Install app at the top right when it appears, or open the browser menu and choose Install app or Add to Home screen.
- iPhone (Safari): tap the Share button, then Add to Home Screen.
The button only appears when your browser offers installation, so if you do not see it, the menu route still works. Once installed, the calculator opens offline. Fetching a bill and reading the blog still need a connection.
Step 2: Choose your company, and meet the i icons
Open the Electricity company dropdown and pick the company named on your bill: IESCO, LESCO, GEPCO, FESCO, MEPCO, PESCO, HAZECO, TESCO, HESCO, SEPCO, QESCO or K-Electric. The tariff is the same nationwide, so this mostly changes the duty and tax defaults, and whether autofill is available. The details are in electricity companies in Pakistan.
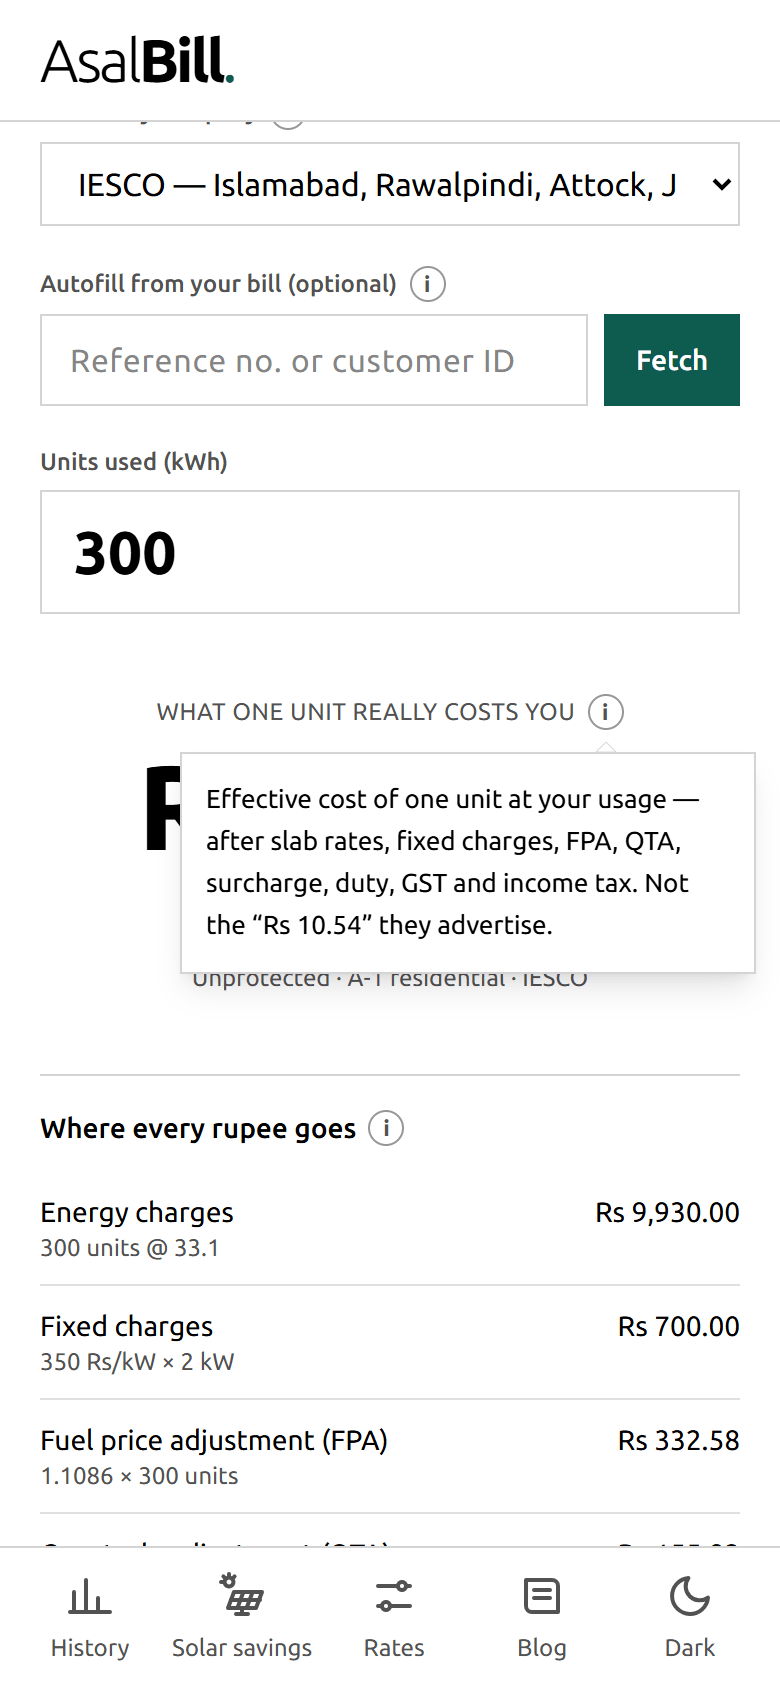
Notice the small i beside many labels. Wherever the page would need a paragraph of explanation, it puts a short note behind one of these instead. Tap it to read, and tap anywhere else to close it.
Step 3: Enter your units and read the real cost
Type the units from your bill into Units used (kWh). There is no calculate button; the answer changes as you type. Scroll down to see it.
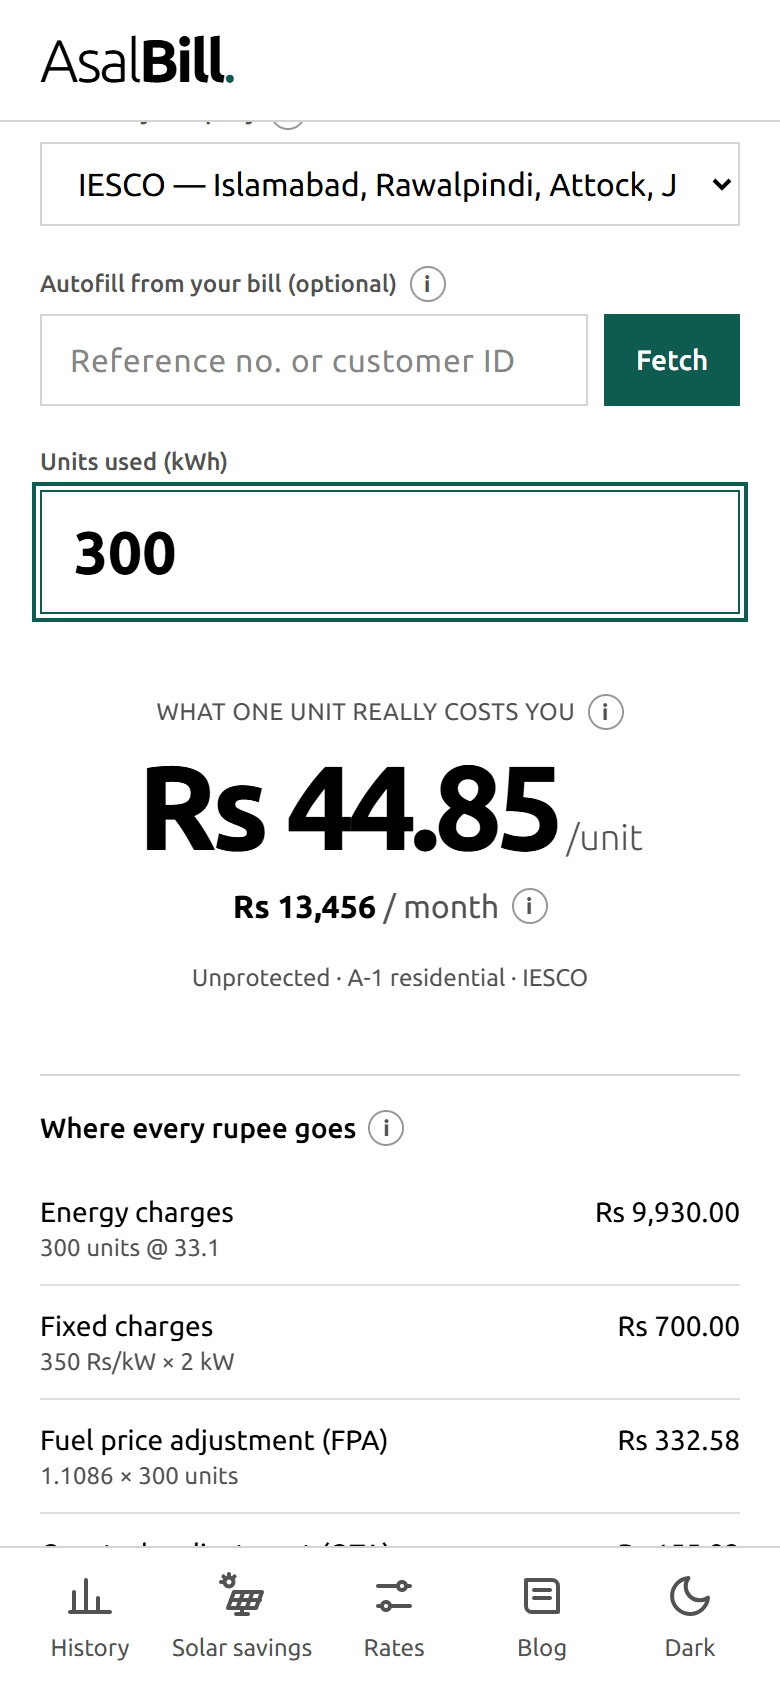
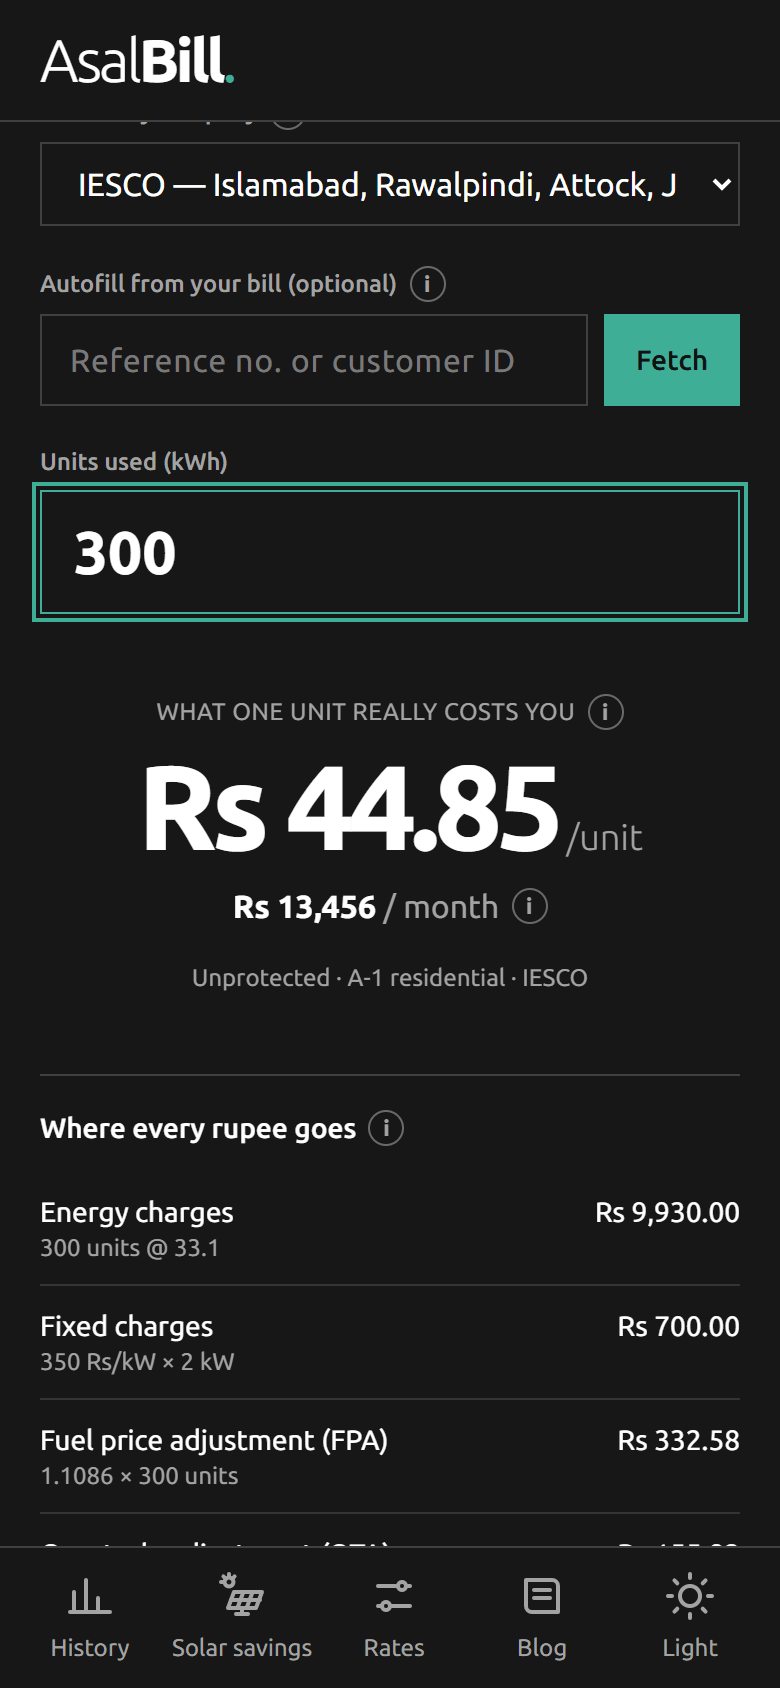
The large number is the real cost of one unit after every tax and surcharge, and the line beneath it is the estimated bill for the month. In this example the slab rate for 300 units is Rs 33.10, yet each unit really costs Rs 44.85. The small line under the total names your category, the tariff and your company. If the calculator had to assume something to pick your category, a small amber i appears there with the reason.
Step 4: Check the details
Scroll down to Details. These settings change the bill more than most people expect.
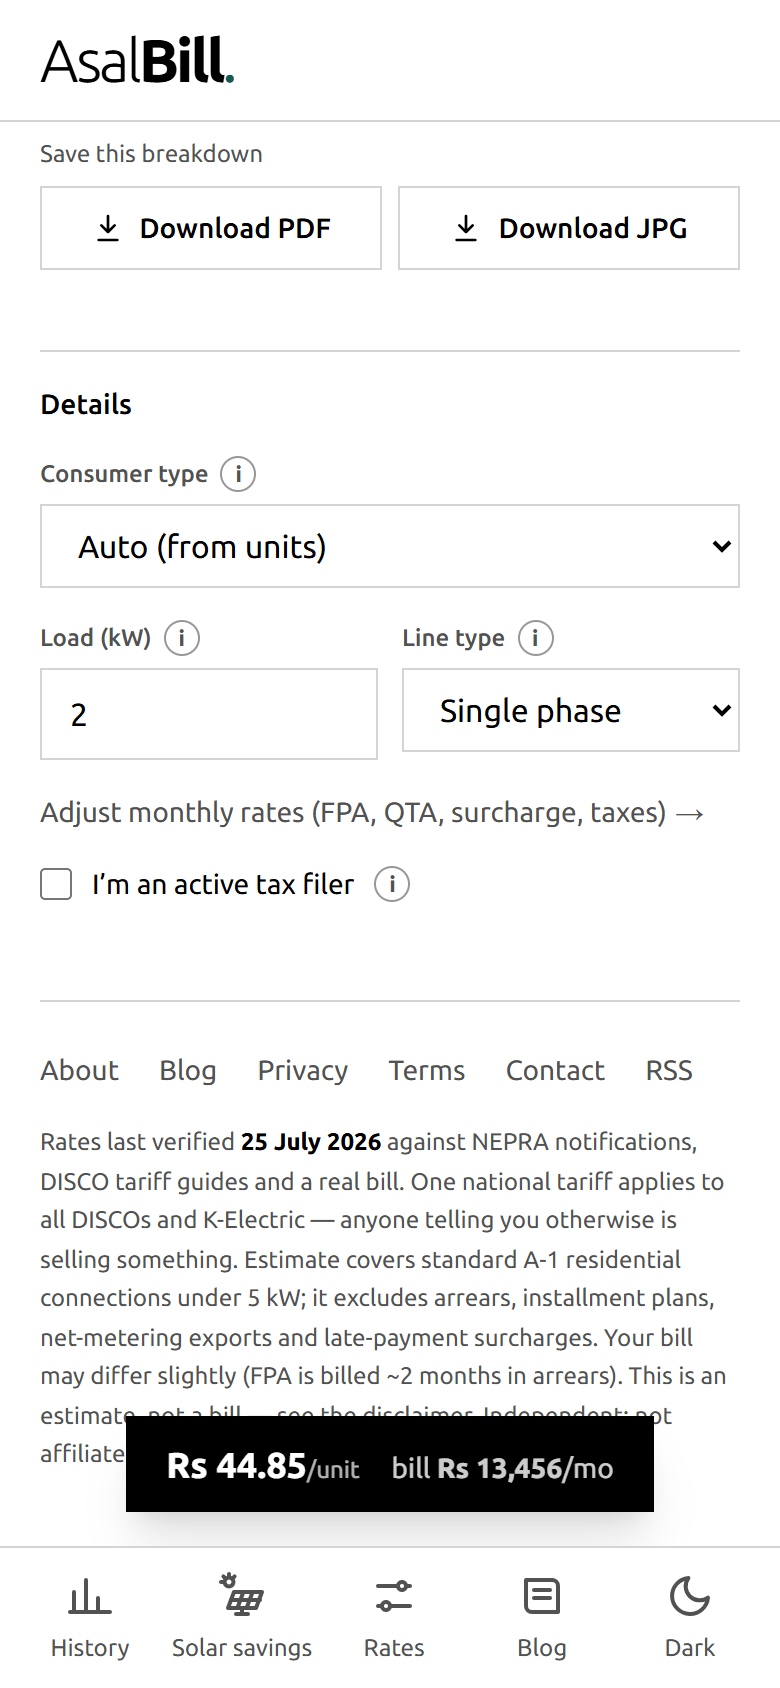
- Consumer type is Auto by default. It picks between protected and unprotected from your units, and from your six-month history if you have fetched a bill. Choose Lifeline yourself if you qualify. The rules and the 200-unit cliff are in lifeline, protected and unprotected consumers.
- Load (kW) is your sanctioned load, printed on your bill. It sets your fixed charge. At 5 kW or more, a Peak share field appears, because those connections are on a different tariff; see the time-of-use tariff.
- Line type is single or three phase and only affects the minimum charge for lifeline users.
- I am an active tax filer removes the 7.5 percent advance income tax that non-filers pay once a bill reaches Rs 25,000; see income tax and the filer checkbox.
Step 5: See where every rupee goes
Scroll down from the result. The section called Where every rupee goes is on the page itself, with nothing to open, so you can read it while you change your units.
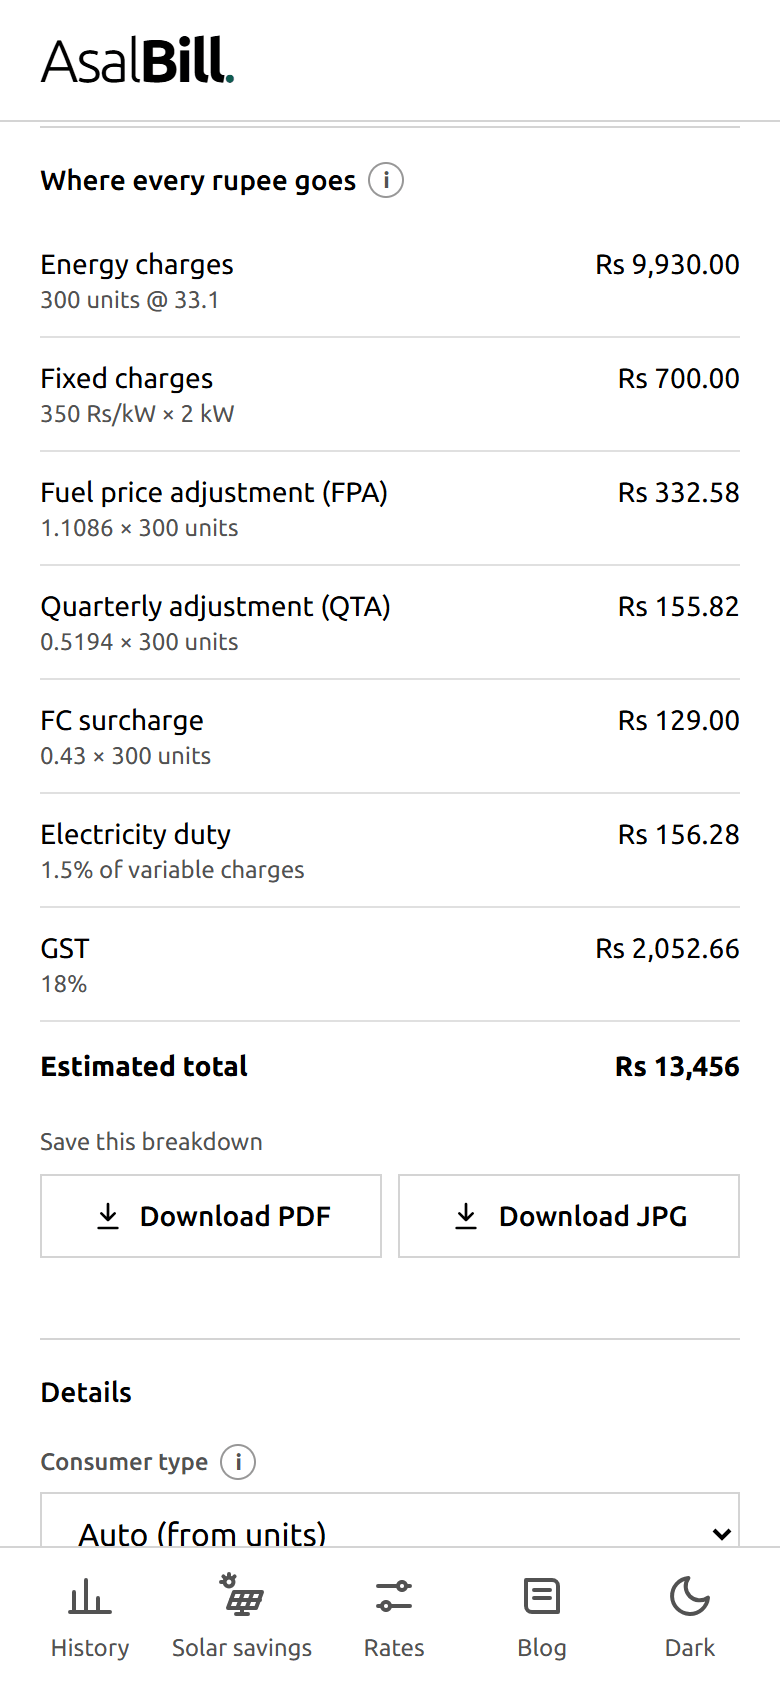
Each row shows a line of the bill, a short note on how it was worked out, and the amount. Read it from the top, because later lines are worked out from earlier ones: duty is charged on the energy and the adjustments, and GST on nearly everything including the duty. If one line looks large, you know which setting to examine. The full order of calculation is in where every rupee goes.
Step 6: Save it as a PDF or a picture
Under the table, tap Download PDF or Download JPG to keep the breakdown or send it to someone, for example a family member who pays the bill, or as a record of an estimate. Both files are made on your own phone and nothing is uploaded. The PDF is a one-page document with real text that you can select and search. The JPG is a picture sized for sharing in a chat.
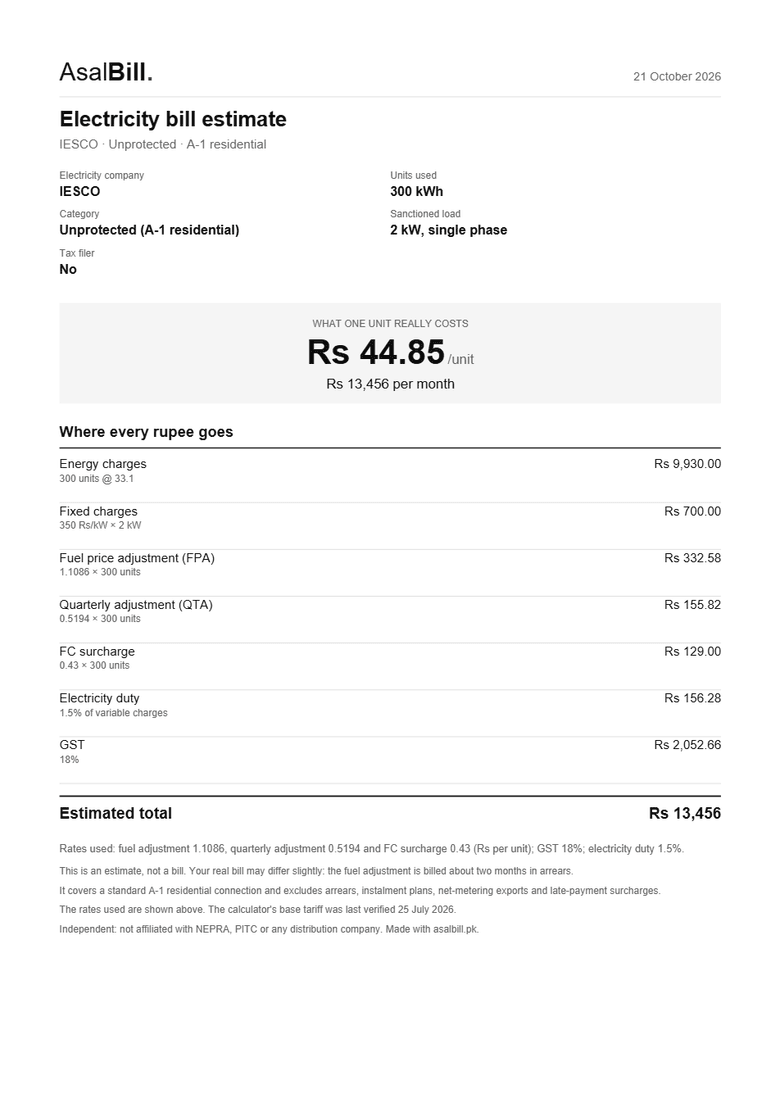
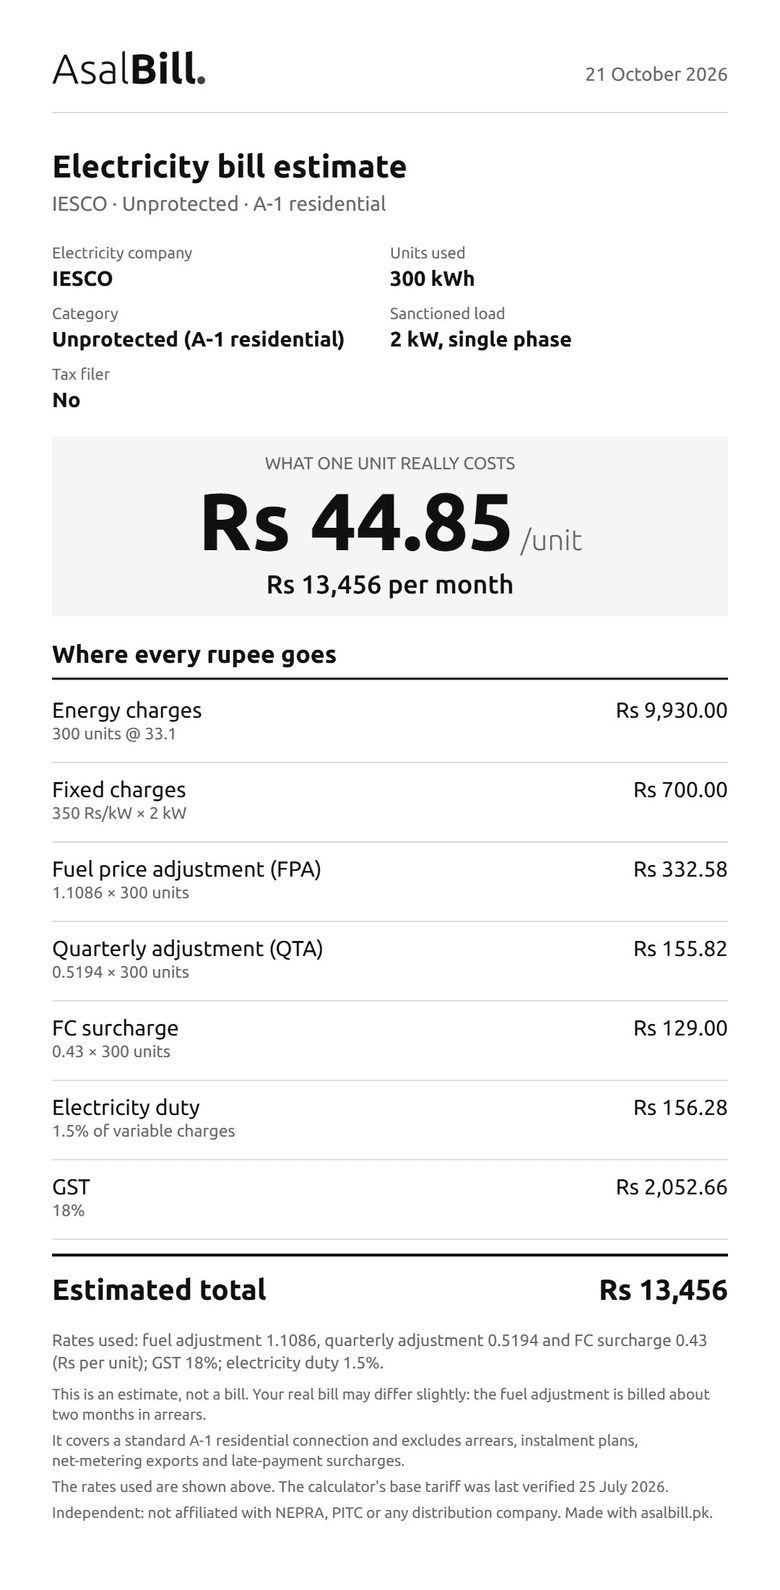
The file shows the company, units, category, load, every line, the rates used and the date. It never contains your reference number, customer ID, name or address, even after a fetch. The file name says what it is, for example asalbill-iesco-300-units-2026-10-21.pdf. If your phone says the file could not be created, try the other format.
Step 7: Fill everything in from your bill
Typing units gives an estimate. Autofill gives you your own bill. Enter the 14-digit reference number or the 10-digit customer ID printed on your bill, then tap Fetch. The customer ID is the better one to keep, because companies sometimes re-issue reference numbers. The number in the screenshots is made up.
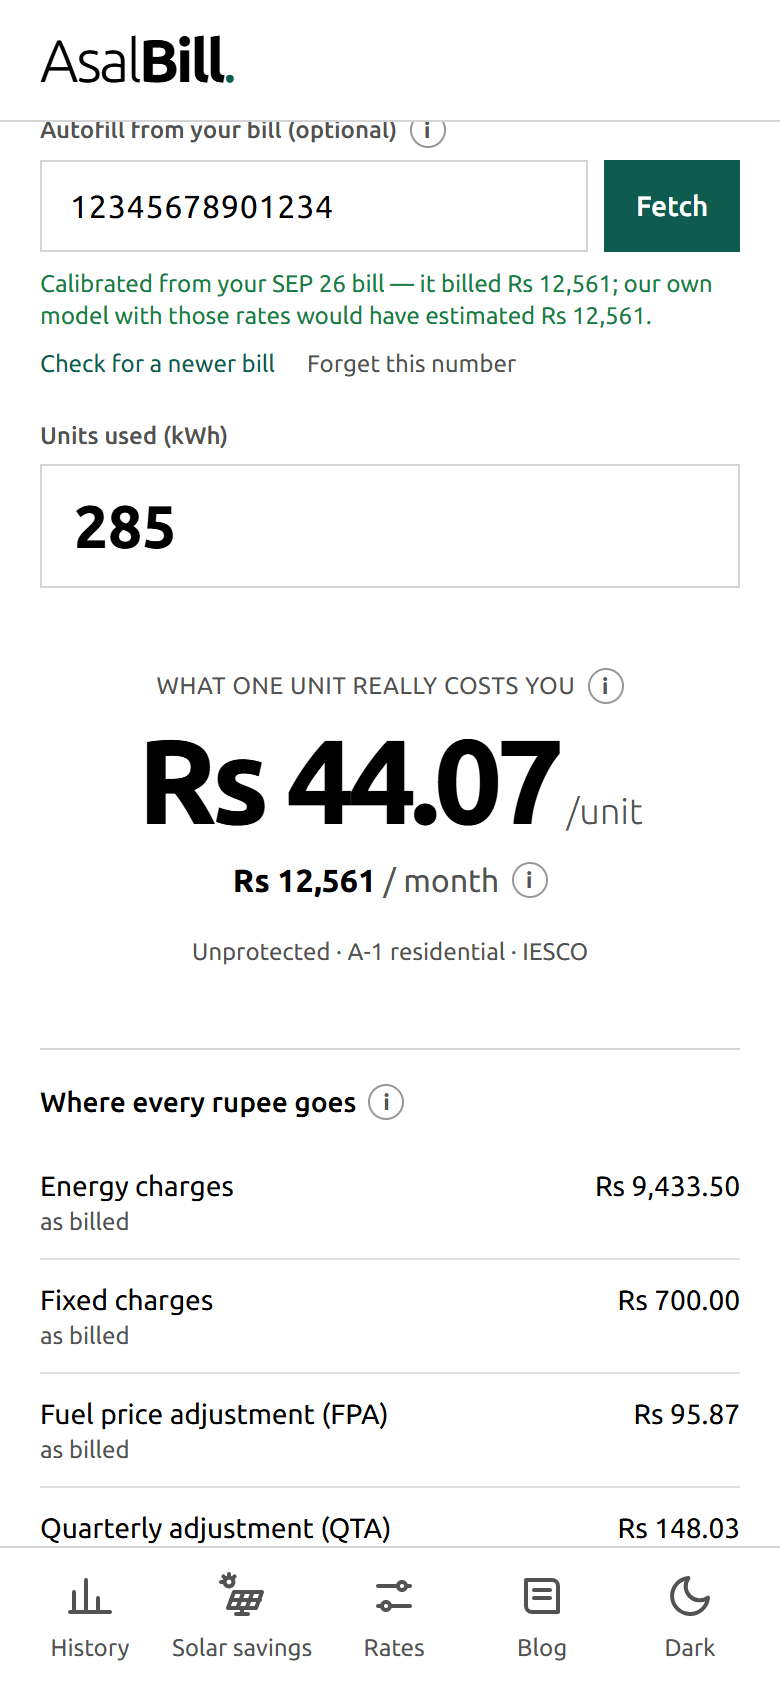
The calculator reads the figures from the official PITC billing portal and fills in your units, load, consumer type and that month's own rates. K-Electric uses a different portal that needs a login, so for Karachi the autofill box is hidden. Your name and address are never read. After you fetch, the page remembers the connection on your device, so a return visit is instant. The details and the privacy side are in autofill from your bill and saved connections and your privacy.
Scroll back to the breakdown and it now shows your actual bill:
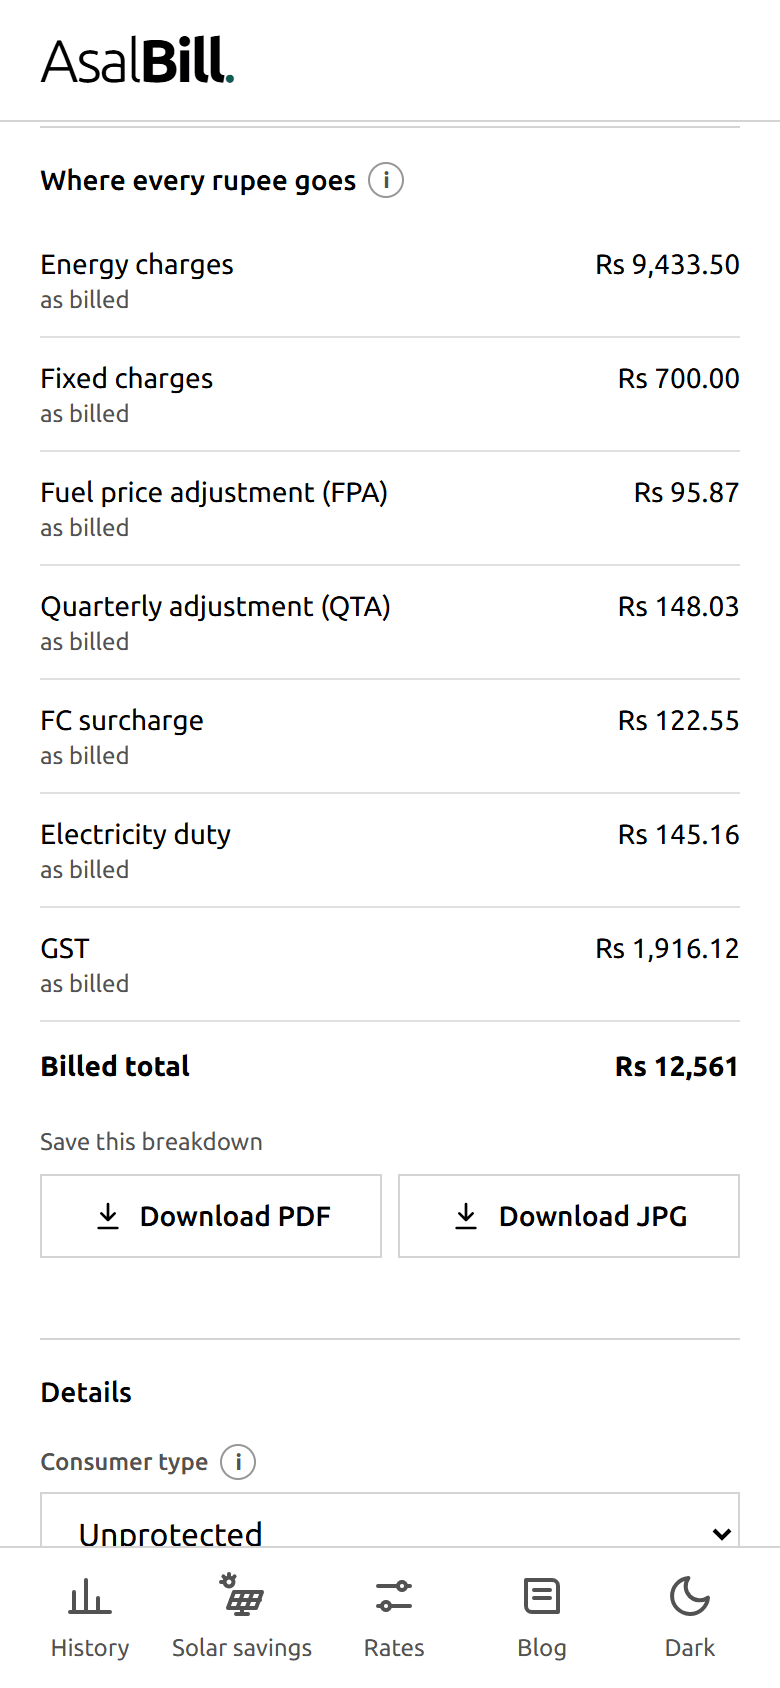
The label on the last row tells you which one you are looking at: Billed total for your real bill, Estimated total once you change a field.
Step 8: Look at your last twelve months
With a bill fetched, tap History in the bottom bar.
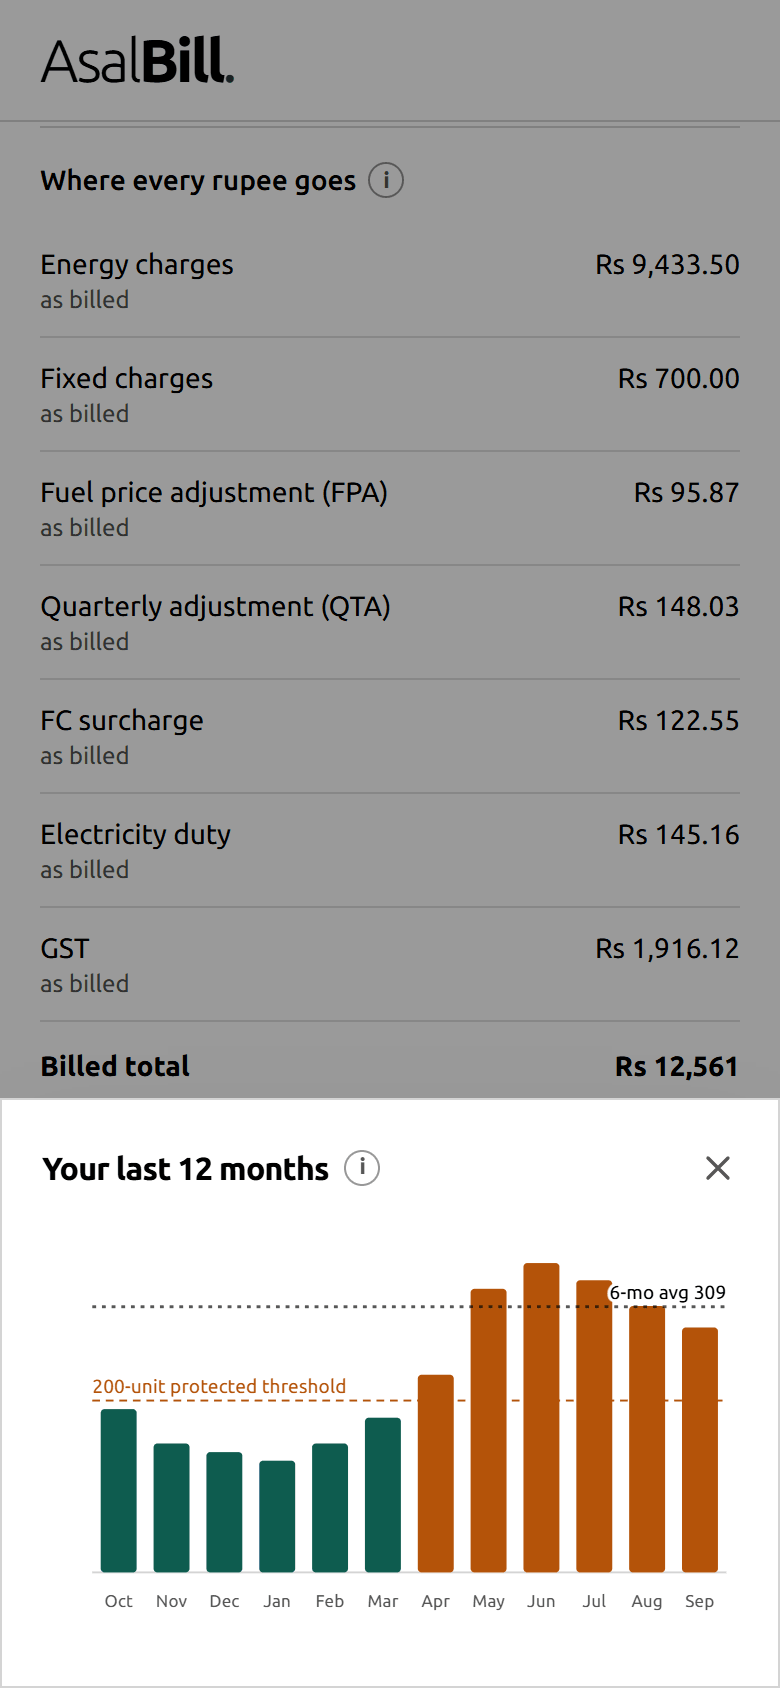
Each bar is one month. Bars above the dashed 200-unit line are orange, and the dotted line is your six-month average, which is what decides whether you pay protected or unprotected rates. Here the average is 309, so every month is billed as unprotected, even a light one. Without a fetched bill, the History button explains that it needs one. More in your twelve-month usage history.
Step 9: Test your solar savings for a month
Tap Solar savings. Open your inverter app, read the units your panels made over the same dates as the bill, and enter them as Solar made. If you export power under net metering, enter the exported units too.
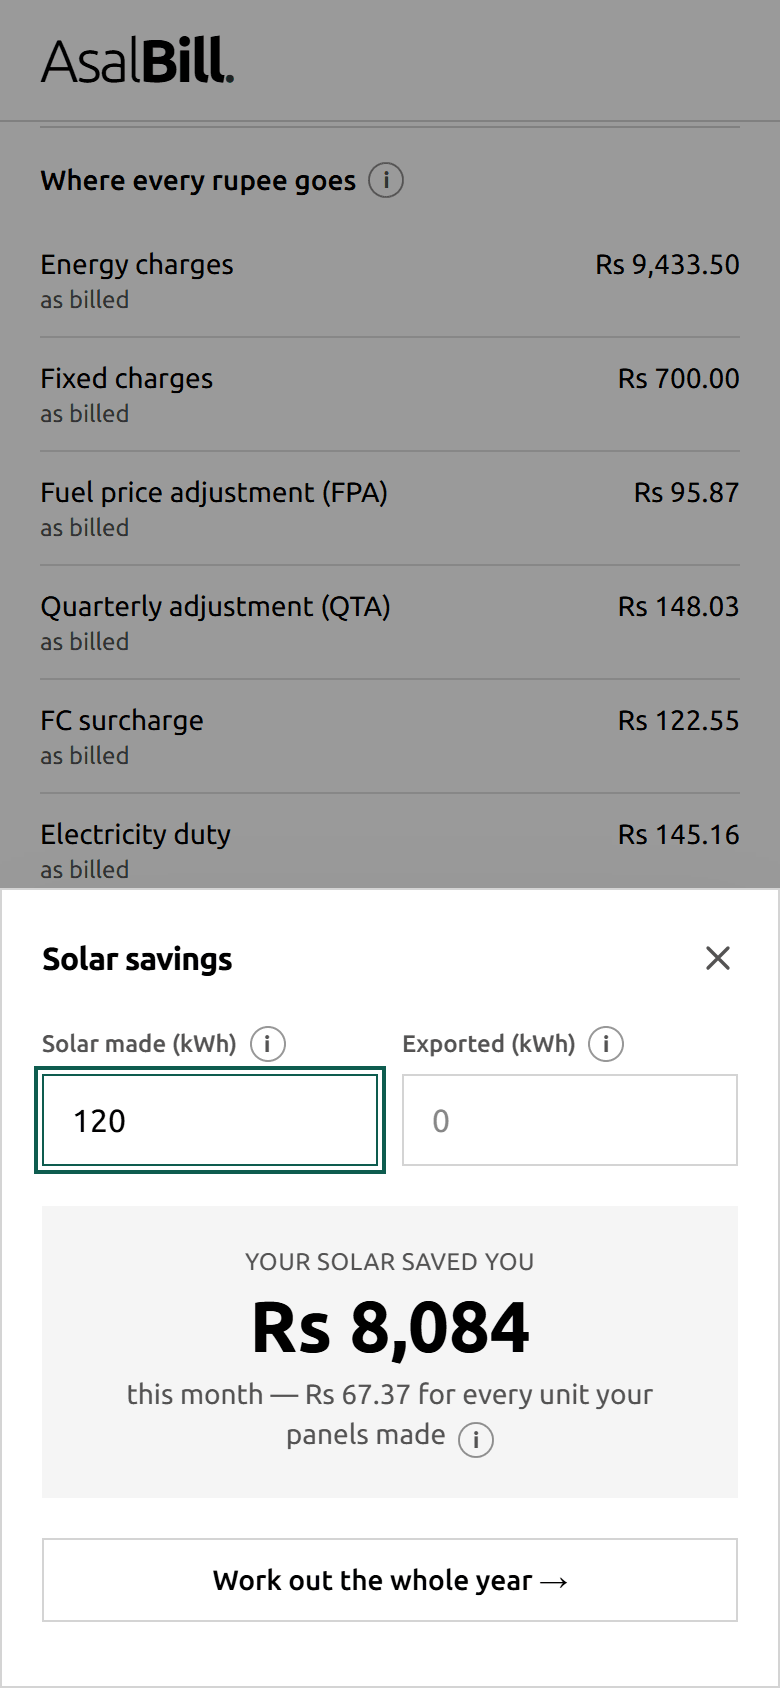
The calculator re-bills the month as if those units had been bought from the grid, and shows the difference. That is often more than units times the tariff, because extra units can push every unit into a dearer slab. Tap the small i beside the result for the arithmetic. If you export, remember that exported units are paid separately and are left out of this figure; the rules for new solar users are in net billing replaces net metering.
Step 10: Work out the whole year
Tap Work out the whole year at the bottom of the same sheet.
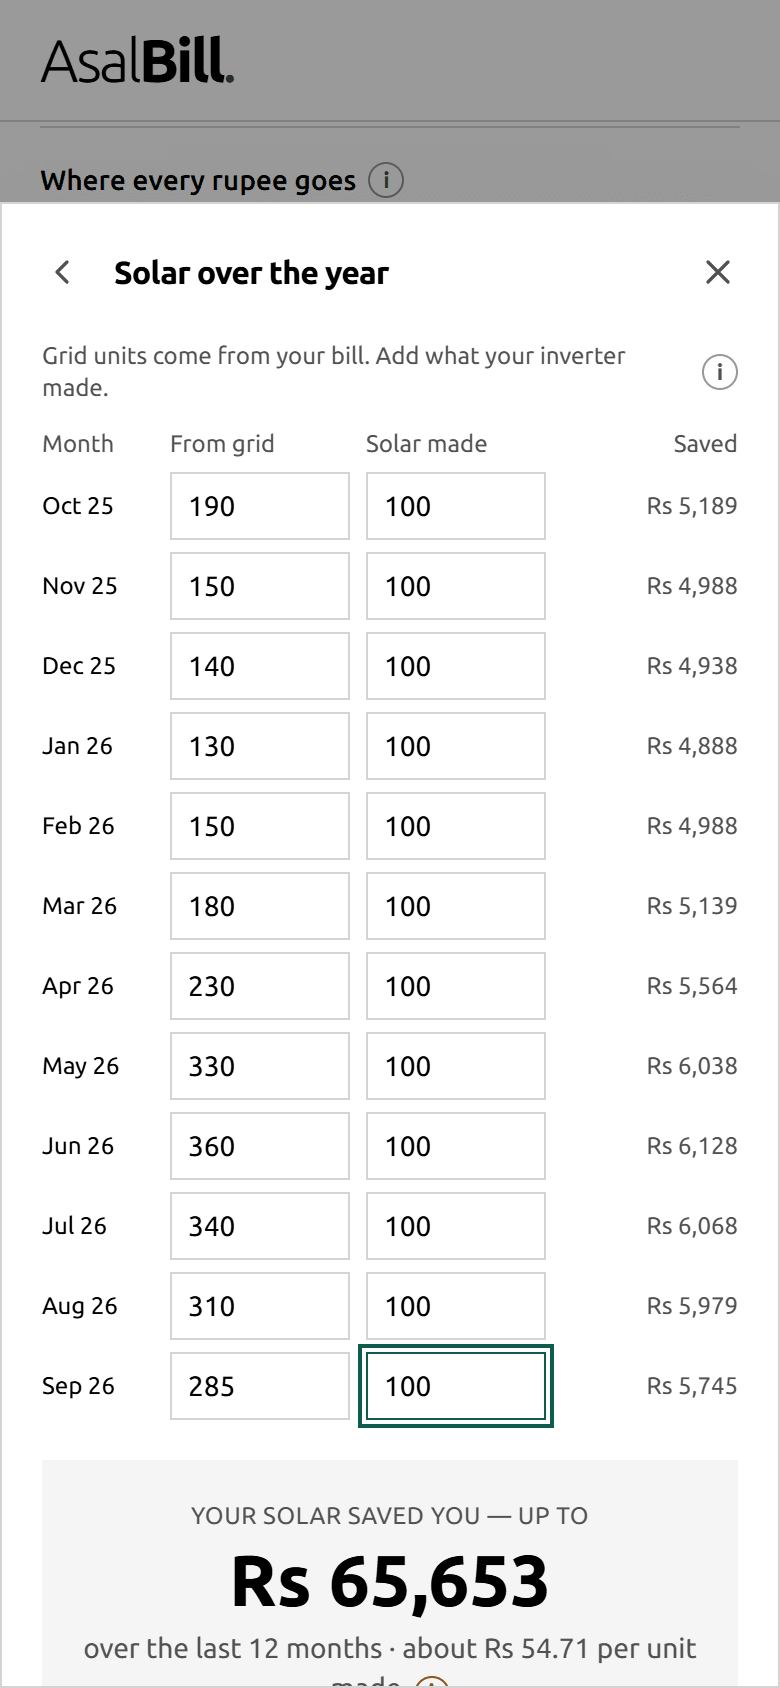
The grid column fills itself in from the twelve months printed on your bill, so you only type what your inverter made each month. Leave the months before the panels went up blank. The result is worded up to on purpose: it assumes every solar unit replaced a grid unit, so a home that exports a lot will save less. The caveats are behind the i, and in solar savings over a whole year. What you type is saved on your own device.
Step 11: Keep the rates current
Tap Rates to see and edit the numbers behind every estimate.
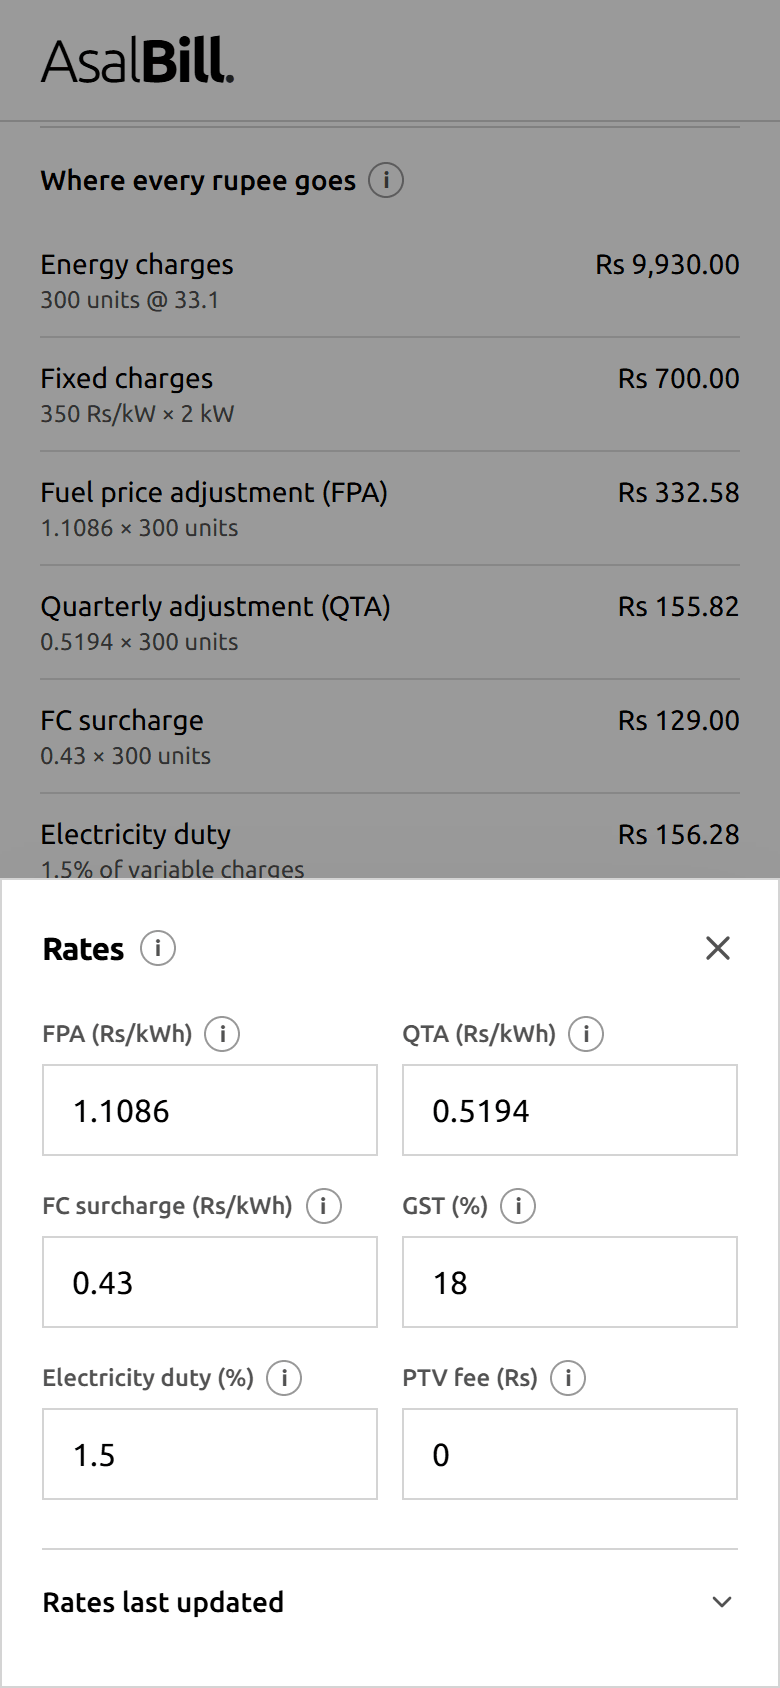
The fuel and quarterly adjustments change every month or quarter and can be positive or negative, so they matter most. If you have fetched a bill, they already match it. Otherwise copy them from your latest bill, or from the October 2026 prices. Open Rates last updated to see when each figure was last checked. Edits last until you reload the page.
Step 12: Dark mode
Tap Dark in the bottom bar, or the moon icon at the top on a larger screen, and the whole app switches. The button then offers Light. AsalBill remembers your choice.
Step 13: On a computer
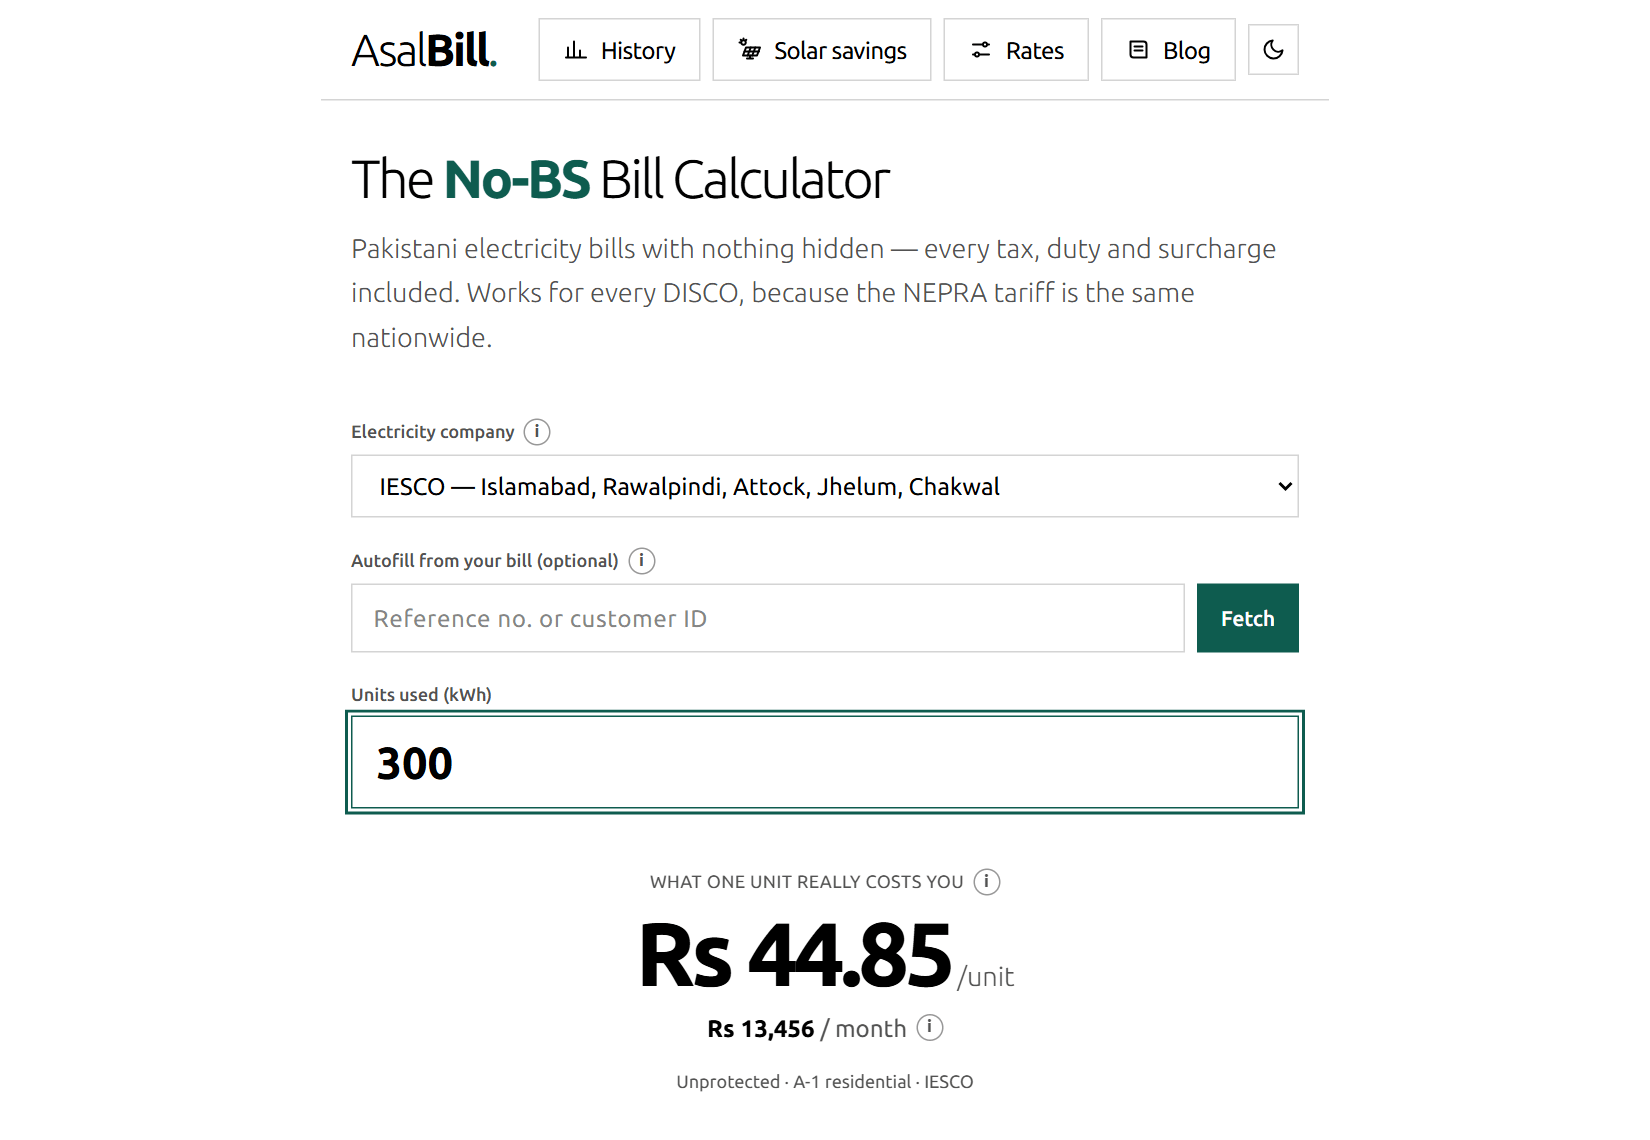
Everything above works the same on a laptop. The tools move from the bottom bar to the top of the page, and the layout widens.
What to do next
- Fetch your own bill and read the breakdown line by line.
- Watch your six-month average in History, and keep it under 200 units if you are close.
- Try your load. Lower the sanctioned load in Details and watch the per-unit cost fall.
- If you have solar, enter your inverter figures each month and let the year build up.
- Check the date beside each rate before relying on a total.
The calculator is an estimate for a standard residential connection. It excludes arrears, instalment plans, late-payment surcharges and the settlement your company makes for exported units, and your real bill may differ a little because the fuel adjustment is billed about two months late. Open the calculator and try your own numbers.